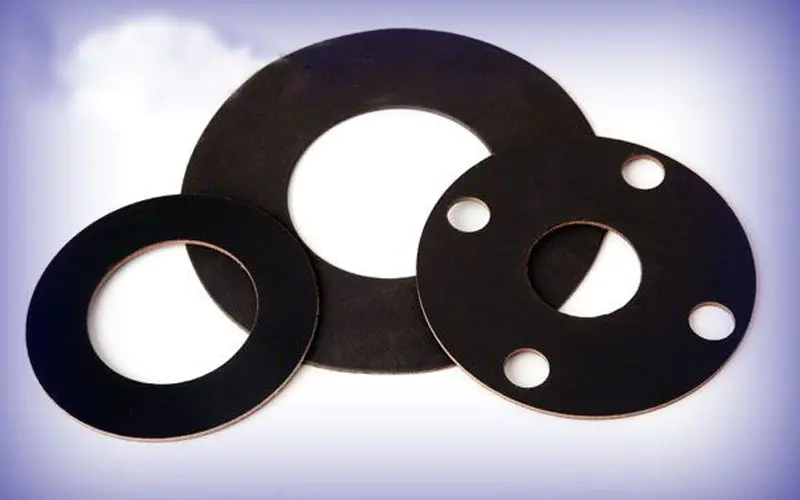
Picture a flange joint that passed inspection on Friday and drips on Monday. The bolts are tight, the line is clean, and the gasket is still new, yet the joint has already lost its seal. For maintenance planners and procurement teams, that scenario is expensive because the gasket is rarely the only cost; downtime, re-torque labor, and repeated shutdowns quickly outweigh the part price. So, how do you install a Kammprofile Gasket Basic Style correctly? The answer is not a single torque value or a quick wipe of the flange. Correct installation depends on clean and flat sealing surfaces, correct gasket centering, controlled bolt-up in stages, and a final check that the load is evenly distributed around the joint. A Kammprofile gasket basic style uses a grooved metal core with soft facing layers, so it can seal well at lower bolt load than many conventional gaskets, but it still needs a disciplined installation sequence. Ningbo Kaxite Sealing Materials Co., Ltd. supplies Kammprofile gasket basic style solutions for buyers who need consistent dimensions, reliable facing quality, and practical installation guidance before the gasket reaches the flange. The sections below turn the installation question into a field-ready checklist, with parameters that procurement teams can share with maintenance and contractors.

The pain scene is familiar: a crew treats a Kammprofile gasket basic style like a simple flat gasket, slides it into place, and tightens bolts in one pass. The joint may pass a short pressure test, but vibration, thermal cycling, and uneven compression can open a leak path later. The solution is to control the variables that matter before torque is applied: confirm the gasket identity, check flange alignment, keep sealing faces clean, center the gasket, and use a documented bolt-up procedure. Basic style Kammprofile gaskets do not have an outer ring to guide centering, so alignment deserves extra attention.
| Parameter | Field Guidance | Why It Matters |
|---|---|---|
| Gasket identity | Confirm core material, facing type, thickness, and dimensions against the purchase order. | A different facing or thickness changes compression and sealing behavior. |
| Flange condition | Clean, dry, flat, and free of old gasket residue. | Residue creates high and low spots that prevent even load. |
| Alignment | Center the gasket on the flange bore and keep faces parallel. | Off-center placement can restrict flow or create an uneven seal. |
| Bolt lubrication | Use approved lubricant on threads and nut faces only, not on sealing faces. | The wrong lubricant changes torque-to-load conversion. |
| Reuse | Install a new gasket for each joint. | Compressed facing layers cannot reliably recover after service. |
The pain scene often appears during a fast turnaround: the flange looks good from a distance, but radial scratches, scale, or a warped face are hidden under old residue. A Kammprofile gasket basic style needs a sealing surface that lets the soft facing layer compress into the metal grooves without bridging defects. The solution is a short inspection routine with a straightedge, a clean lint-free cloth, and a surface finish check when the specification requires it. If a flange is badly pitted or warped, re-machining or replacement is usually cheaper than a repeat shutdown.
| Surface Parameter | Practical Target | Risk If Missed |
|---|---|---|
| Flange finish | Use the finish range recommended for the facing type; graphite-faced gaskets commonly work with a controlled, not mirror-polished, finish. | Too rough can tear the facing; too smooth can reduce bite and sealing stability. |
| Flatness | Check with a straightedge; no visible warp across the sealing face. | Uneven gaps produce uneven bolt load and localized leakage. |
| Radial defects | No scratches, gouges, or tool marks crossing the sealing path. | A radial mark can become a direct leak channel. |
| Cleanliness | No oil, scale, rust, or old gasket material. | Contaminants cause false seating and torque loss. |
| Compatibility | Match facing and core to medium, pressure, and temperature. | Chemical attack or thermal degradation shortens service life. |
The pain scene is a single-pass tighten with an impact wrench: one bolt reaches full torque while the opposite side is still loose, and the gasket is compressed unevenly. The solution is a star or cross pattern in stages, using a calibrated torque wrench and a recorded target. For a Kammprofile gasket basic style, the goal is uniform gasket stress, not maximum bolt force. Overloading can crush the facing or distort the flange; underloading leaves the joint vulnerable to pressure and thermal movement. After the first thermal cycle, follow the approved procedure for a re-torque check if the service conditions require it.
| Bolt-Up Stage | Action | Check Point |
|---|---|---|
| Hand tight | Bring flanges together evenly and confirm gasket centering. | Faces parallel; gasket not pinched or offset. |
| 30% target torque | Tighten in a star or cross pattern. | No visible gap change; gasket stays centered. |
| 60% target torque | Repeat the same pattern. | Bolt loads begin to equalize around the joint. |
| 100% target torque | Complete the pattern with a calibrated wrench. | Final torque recorded; no over-torque on any bolt. |
| Thermal re-check | After the first cycle, check residual torque if the procedure allows. | Compensation for creep relaxation and thermal movement. |
The pain scene is a leak that returns after every repair because the same installation shortcut is repeated. Procurement teams often hear “the gasket failed,” but the real cause may be a dirty flange, mixed bolts, a missing washer, or a torque wrench that has not been calibrated. The solution is to treat installation as a controlled process with a short checklist. Ningbo Kaxite Sealing Materials Co., Ltd. can support buyers with gasket dimensions, facing options, and practical guidance that helps maintenance teams avoid repeat failures.
| Mistake | Field Result | Prevention |
|---|---|---|
| Tightening one bolt to full torque first | Uneven compression and a leak path | Use star or cross pattern in stages. |
| Skipping flange cleaning | False seating and residual leak channels | Clean with approved solvent and lint-free cloth. |
| Using an impact wrench only | Over-torque or under-torque without records | Finish with a calibrated torque wrench. |
| Mixing bolt materials | Different expansion and load loss | Use matched, correctly lubricated fasteners. |
| No installation record | Repeat failure without root cause data | Log torque, pattern, gasket batch, and technician. |
The pain scene for a buyer is a shipment that arrives with the right outside diameter but the wrong facing, thickness, or tolerance, forcing a line to wait. The solution is to specify the Kammprofile gasket basic style by function, not by name alone. Confirm core grade, facing material, thickness, bore, outside diameter, tolerance, marking, certificates, and flat packaging. A clear specification reduces back-and-forth and protects the installation team from surprises at the flange.
| Buyer Specification | What to Confirm | Benefit |
|---|---|---|
| Core material | Stainless steel grade and thickness | Corrosion resistance and compression strength |
| Facing material | Graphite, PTFE, or other grade matched to medium and temperature | Sealing reliability and chemical compatibility |
| Dimensions | ID, OD, bore, thickness, and tolerances | Correct fit and predictable bolt load |
| Documentation | Certificate of conformance, material certificates, and batch traceability | Audit readiness and quality control |
| Packaging | Flat, protected, and clearly labeled | No facing damage before installation |
The pain scene behind most questions is uncertainty: buyers and maintenance teams want one simple rule, but flange size, pressure class, facing type, and bolting condition all affect the answer. The solution is to follow a controlled sequence and confirm torque values with the gasket supplier and flange calculation. The table below summarizes the field logic before the two detailed questions.
| Question | Short Answer | Field Note |
|---|---|---|
| How do you install a Kammprofile gasket basic style correctly? | Clean and inspect the flange, center a new gasket, then tighten in stages with a calibrated wrench. | Use the approved torque and pattern for the joint, not a generic value. |
| Can torque alone prevent leakage? | No; surface condition and even load matter just as much. | Record final torque and check for gaps around the flange. |
Q: How do you install a Kammprofile gasket basic style correctly?
A: Confirm the gasket dimensions and facing, clean both flange faces, remove old residue, check flatness, center the gasket, lubricate bolts as approved, and tighten in a star or cross pattern at 30%, 60%, and 100% of the target torque with a calibrated wrench. Inspect the final gap and record the result.
Q: What bolt torque should be used for a Kammprofile gasket basic style?
A: Use the torque value calculated for the specific flange, bolt size, lubrication, gasket stress, pressure, and temperature. A generic torque chart can over-compress or under-load the joint. Ningbo Kaxite Sealing Materials Co., Ltd. can help buyers confirm gasket parameters so the installation team can work from a controlled procedure.
For procurement teams that need fewer installation surprises, Ningbo Kaxite Sealing Materials Co., Ltd. provides Kammprofile gasket basic style solutions with controlled dimensions, facing options, and practical support from inquiry to delivery. The company helps buyers match gasket construction to pressure, temperature, medium, and flange conditions, reducing the risk of leaks, rework, and delayed shutdowns. Review product details at https://www.kaxitesealing.net, and send flange data, drawings, target torque, or application details to [email protected] for a clear response from Ningbo Kaxite Sealing Materials Co., Ltd.
Abid, M., & Nash, D. H. (2003). Comparative study of the behaviour of conventional gasketed and compact non-gasketed flanged pipe joints under bolt up and operating conditions. International Journal of Pressure Vessels and Piping, 80(12), 831–841.
Bouzid, A. H., & Nechache, A. (2005). The modeling of the effect of gasket creep-relaxation on the leakage performance of bolted flange joints. Journal of Pressure Vessel Technology, 127(3), 275–281.
Nechache, A., & Bouzid, A. H. (2007). Creep and relaxation of bolted flange joints. Journal of Pressure Vessel Technology, 129(4), 693–700.
Krishna, M. M., Shunmugam, M. S., & Siva Prasad, N. (2007). A study on the sealing performance of bolted flange joints with gaskets using finite element analysis. International Journal of Pressure Vessels and Piping, 84(6), 349–357.
Sawa, T., & Higurashi, N. (1992). A study on the sealing performance of pipe flange connections with gaskets. Journal of Pressure Vessel Technology, 114(2), 204–209.
Fukuoka, T., & Takaki, T. (2003). Finite element simulation of bolt-up process of pipe flange connections. Journal of Pressure Vessel Technology, 125(3), 282–287.
Takaki, T., & Fukuoka, T. (2004). Three-dimensional finite element analysis of pipe flange connections under internal pressure. Journal of Pressure Vessel Technology, 126(4), 477–483.
Kumano, H., Sawa, T., & Hirose, T. (2005). Mechanical characteristics of bolted pipe flange connections under elevated temperature. Journal of Pressure Vessel Technology, 127(1), 49–55.
Diany, M., & Bouzid, A. H. (2010). Evaluation of the gasket stress in bolted flange joints. Journal of Pressure Vessel Technology, 132(3), 031202.
Bouzid, A. H., & Diany, M. (2009). On the use of the ASME code to design bolted flange joints. Journal of Pressure Vessel Technology, 131(2), 021202.
-